
Page updated: August 25, 2016 05:59 PM EDT
Craig's ACX100 HowTo
The latest version of this document can always be found here: http://www.houseofcraig.net/acx100_howto.php
Commentary and suggestions about this howto go here:

Everyone, please read the Updates
Quick Links:
Downloads•
Installing•
Testing•
Configuring•
Compiling•
Knoppix 3.3 Live CD•
Removing the 'Leaked' binary driver
Introduction
This page is for Linux users who have Texas Instruments' Acx100-based wireless PCI and/or CardBus cards and would like them to become functional. These are cards that typically
either have a "+" in their name or model number or that claim a 22mbps top speed. The "+" comes from the 802.11b+ "standard" which is actually not a real standard, but a
Texas Instruments' invention using 802.11b and something they call Packet Binary Convolutional Code to achieve double the speed of standard 802.11b cards. This howto is
based on Mandrake 9.0, 9.1, 9.2, Slackware 9.0, 9.1, RedHat 9.0, and Knoppix 3.3 (Both the Live CD and installed to the hard-drive which becomes essentially Debian unstable) all running on a Thinkpad 600 using an SMC 2435w card with an SMC 2404WBR wireless router. Since most (if not all) of these cards use the TI chipset,
this should apply more or less to any make/model 802.11b+ card. This HowTo should also apply to regular PCI cards, and while I have heard from people that it does,
I have not personally tested with any acx100 PCI cards.
I am making available for download the same module (driver) I am currently using for as many kernel versions as is practical for me to compile. The version of which will
increment as the good folks of the
acx100 project release new versions. I intend to keep current with that project by updating the modules here every time they release a new
version. As of this writing the latest version is
0.2.0pre7, older versions will also be available should the latest one give you trouble and you need to fall back
temporarily.
I've written this howto for people who are new to linux, and simply want to get this card working, not become linux gurus. This necessitates sometimes painful amounts of
explanation and step-by-step instructions. Non-newbies and gurus, please bear with me. For advanced linux users who have had success with other wireless devices
and linux and just need a quick rundown of this module's differences, here's a really
quick guide to this chipset/driver.
This HowTo is based entirely on the Open Source
acx100 project, the binary drivers
available from Ivor are also functional with
my hardware and have a good howto bundled with them. I prefer to use the open source driver as it is already
vastly superior to the binary driver, this helps them to debug it
and helps the community as a whole. Yes, this driver is still alpha, meaning it's author's don't even consider it beta software, it's going to be a bit quirky. I use it every day and
this document is posted using it. I find it quite useable, and it get's better with nearly every release. Work-arounds for the quirks will always be documented here as I find them.
Understand that this howto is
not compatible with the
README's instructions regarding the use of the start_net script (for other than the Knoppix solution), rather it attempts
to help you integrate this driver module into the system like any of the other normally supported modules. So, go one way or the other, but
not both, if you elect to use the
start_net script, you may still be able make use of the downloads, but stop there and use the
README as your guide. If you're
going to follow the instructions in this document, then don't use the start_net script at all.
Updates
0.2.0pre7_plus_fixes_4 users: note that this exact version marks the introduction of a new filename for the driver module. No longer will it be acx100_pci.o, but instead acx_pci.o. If you're downloading and compiling any version of 0.2.0pre7, which is "plus_fixes_4" or later, you'll have to substitute acx_pci for anything below that says: acx100_pci.
Mandrake 10c users: this document is not yet updated for kernel 2.6.3. While I personally use this kernel version daily with my acx100 card and Slackware 9.1, I'm still testing, and so: some of the info here is applicable, and some is not. A downloadable module for Mandrake 10c and the corresponding instructions are "coming soon", but not yet here, so you're on your own until you see something otherwise in this section.
We now have the absolute latest modules in RPM format for
SuSE 9.0 users, available for download. Special thanks to
Rudi Pittman for contributing his efforts for all of you SuSE 9.0 users, please take the time to thank him.
Quick note for any of you advanced users using a recent distro and trying to use the acx100 driver with kernel 2.6.x. If you're wondering why you can't seem to pass any parameters to the driver module, namely the firmware_dir param, what you need to know is that the newer kernels (2.5 and later) use /etc/modprobe.conf, not /etc/modules.conf. To obtain a useable modprobe.conf derived from your existing /etc/modules.conf file, run this as root: /sbin/generate-modprobe.conf /etc/modprobe.conf. I hope this saves you some time.
Knoppix 3.3
Live CD and installed-to-the-hard-drive users who have the most recent 3.3 version dated February 9, 2004 with kernel
2.4.24-xfs, there are now 0.2.0pre7
downloads available.
0.2.0pre7 modules are now available for
download, also: D-Link's version 1.9.8.b firmware is now the default download for firmware, if, for some strange reason, you believe that you need the older, 1.9.3.e firmware, then download it, all others: I advise you all to go for the newer 1.9.8.b firmware, as it's the firmware I have tested with each and every pre7 module in the downloads area with their respective distros. Trivia: Do you want to know the "shortest time to ping the router" winners on my setup? Be prepared for a surprise: they are...
Mandrake 9.0 and
RedHat 9.0, yes that's right mdk90 and rh90
both will consistently ping the router in well under 1ms (avg. 0.7ms),
all others came in at right around
2ms or higher, and that includes FreeBSD 5.2rc2 as well, who knew?.
I've had more than a few people ask about it, so: there is now also a pre-compiled download available for all of you
Knoppix-STD version 0.1b users out there (kernel 2.4.20-xfs), check the
Knoppix Live CD section for the download and instructions on how to use it.
Attention! For any of you who've decided to
compile this module yourself, listen up: any version of 0.2.0pre6_plus_fixes_... that is later than 0.2.0pre6_plus_fixes_
10 will require this
v1.9.8.b firmware. The (v1.9.3.e) firmware normally found in the downloads section below works well with the modules found there, which are 0.2.0pre6_plus_fixes_
10 or older.
Just in time for New Year's, Fedora Core 1 modules are now available in the downloads area
By popular demand, for all of you
Knoppix 3.3 users who decided to
install Knoppix 3.3 on your hard drives, I now have a
Knoppix 3.3 hd-install download and have modified the instructions to include Knoppix 3.3 installed on the hd. While not quite as much fun as the "live cd" version, Knoppix 3.3 on the hard-drive is the absolute easiest way to a full-blown Debian-unstable installation that I know of, (trust me, Debian normally takes a lot more work) and definitely a contender as my favorite distro for desktop use, although, at this time it's edged out by Slackware 9.1 which is
easily the snappiest performer of all distros currently installed on my main notebook.
Two more distros are now available thanks to my much larger notebook drive. They are:
Slackware 9.1 which is my current
favorite distro for desktop use, and
Mandrake 9.2 which has been rather disappointing if, like me, you have come to expect more "automatic" configuration from Mandrake than anyone else, right now, "live cd" or hd install, that title belongs to Knoppix 3.3, no real contest.
Mandrake 9.2 users! you need to be aware that as of Mandrake
9.2, there is a
much older version of the Open Source Acx100 driver in the /lib/modules/... tree. When the time comes, the instructions below will direct you as how to move that module somewhere outside of the modules tree in order to use the much-newer version available in the
downloads section below. After spending some time attempting to use Mandrake 9.2's built-in module and their GUI network config tool, sadly, my card was not much closer to configuration than when I started. Mandrake 9.2 users, please be advised, although Drakconnect will now recognize the module that the card needs, that's about as far as it goes, I never achieved functionality without resorting to a console, once at a console I can assure you that the driver/firmware/card works fine with Mandrake 9.2.
0.2.0pre6 modules are now available for
download. Additionally, there's now a
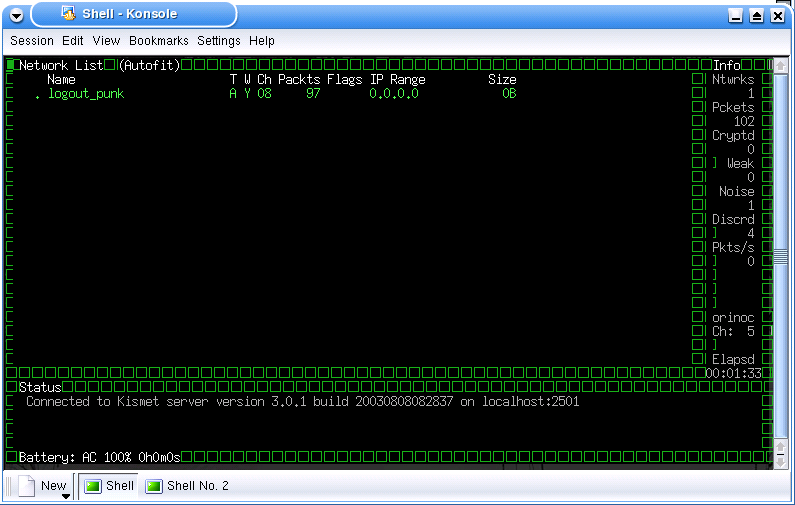
Knoppix 3.3 Live CD section. I absolutely love using the Knoppix 3.3 Live CD and this driver works quite reliably with it. if you like to run Kismet
screenshot, make sure you start it from a console(shell) with this command line:
sudo kismet -c orinoco,wlan0,orinoco, when you're finished "kismet-ing", hit the stop_net and then the start_net icons on the Desktop to restore your connection to your router. Wavemon
screenshot also works with this version quite nicely right from the console(shell). This version of the driver is truly outstanding, more excellent work by the very active acx100 team. Special thanks to
b1smooth and my lovely wife for helping me test the Knoppix 3.3 solution.
I've been using
KWifiManager on my Mandrake/KDE installation for a while now, while you must still hand-edit your config files
to set for 22Mbps since it seems to be hard-coded to stop at 11Mbps, everything else can be configured using it, and it provides an applet with the familiar "stair-step"
signal-strength indicator. Of course at 22Mbps, the bar tends to go "off the chart", here's a
shot of it in action. KDE 3.x users, give it a try.
Firmware
As far as I'm concerned, the use of external firmware is
the biggest difference between this driver and any of the other wireless drivers I've used with Linux. For legal
reasons the open source project has decided not to embed or provide any firmware. For the sake of completeness, until I'm told not to, I am providing the 3 firmware files that
came with my SMC 2435w card, as these modules won't work without firmware. I hope this firmware works for your device(s) and it does for many people who do
not have
smc cards. If not, you'll need to locate the firmware that came with your device and use that instead, see
this section of the readme for how to
do that.
Directions
This is finally the "how to" part of this HowTo. If you would prefer to compile this module locally (on your own machine), or, if no module here will work for you, then start with
the compiling section
Downloading and unpacking the module and firmware
It's quite possible that many of you will be doing this part from Windows rather than Linux, so I'll try to differentiate that for you as I go along. Linux console commands are in
bold text, Linux is highly case-sensitive, type them in verbatim, or even better, cut/paste them into your console by selecting them with the left mouse button and choosing edit/copy (same as Windows) then, switch to your console window and either hit the middle mouse button, or right-click and choose paste.
I like to do things with lists, so here we go:
- Go to the downloads area and right-click the correct file for your running kernel version, choosing a 'save as' option and remembering where you
put the file(s), from windows I suggest c:\windows\temp or from linux use /usr/local, repeat this process for the firmware as well
- If you're using a CardBus (pcmcia) card, remove it at this time. If you're using a PCI card and you've been mucking around with other modules for this card trying to make it
work, be aware this document assumes no other modules are loaded or are even present on the machine for this card, so it's time to undo any of that
business that you've done.
- If need be, exit windows and boot up Linux. I'm assuming that when you boot Linux, you end up with a nice graphical interface with menus, icons and the like. Once there,
you'll need to open a shell (also called terminal, or in kde a Konsole) window from the main menu and switch to the root user: type su -, the "-" in there is important.
You'll be asked for the root password, and you'll have to type it "blind" as no characters will show up as you type, then hit enter, you should now see the name "root" in the
prompt, or when you type whoami it should say root. When this saga finally ends for you, type exit to return to your normal user name, or just close the shell
window. If you're not using a graphical interface then I'm assuming you will know what to substitute for the tasks below. I'm also assuming that if you downloaded these files to
c:\windows\temp that your windows partition is going to be available to you in Linux, these days that's normally set up for you during the Linux install automatically
- Now, change the current working directory, using the example directories from above you would type: cd /mnt/windows/windows/temp or cd /usr/local
- Unpack the module, type tar zxf acx100_pci-v0.2.0pre7-`uname -r`.tar.gz, obviously, if you downloaded an older version other than 0.2.0pre7 then replace the 0.2.0pre7 with the version you downloaded, eg: 0.2.0pre3, 0.2.0pre2, etc. The ` character
surrounding "uname -r", is called a "backtick" it's the key to left of the "1" key. If this command generates several lines of output, one of which contains "cannot open", and
you're sure you don't have any typos, you have the wrong module for your setup and must start over
- Unpack the firmware, type: tar zxf acx100_firmware.tar.gz
- If all the above completes without error, proceed to installing the module and firmware
Installing the module and firmware
This section is intended as a direct continuation of commands typed into a console(terminal window) as root, either from the
downloading section or
from the
compiling section.
You should still be at the same root-console you used for either of those sections, an
ls typed at this time should show these files: acx100_pci.o and either the 3 *.BIN
files from the firmware download, or your own *.BIN file(s) that you copied and possibly renamed from the windows' driver disk for your card.
- Move the module to a typical place for networking modules, type: mv acx100_pci.o /lib/modules/`uname -r`/kernel/drivers/net, notice the backtick surrounds
"uname -r" again here.
- Create a directory for the firmware to live in, type: mkdir /lib/modules/acx100_fmwe
- Whether you're using the firmware downloaded from here or your own re-named firmware, move it to that directory, type: mv *.BIN /lib/modules/acx100_fmwe
- (Knoppix users: skip this step)Using a text-editor like gedit, kedit, or kate, open the file /etc/modules.conf, type: kedit /etc/modules.conf &, substitute your editor
of choice for kedit, if you're not using a windowing system, then type: vi /etc/modules.conf, hit the "i" key to go to edit mode, do your editing and when
finished, hit esc to go back to command mode, and then type :x to save the file and exit vi, if you feel that you've hopelessly screwed things up,
type esc for command mode and :q! to quit without saving, then start over.
Add this line: options acx100_pci use_eth_name=1 debug=0x01 firmware_dir=/lib/modules/acx100_fmwe to the end of the file and save it.
If you're using a PCI card, you'll need to add this line as well: alias eth0 acx100_pci, if there is already an alias there for eth0 and you're sure you have another
ethernet/lan card in your machine,
use eth1 instead and use eth1 as your devicename in all instructions that follow!. CardBus (pcmcia) users don't need or want this line, the hotplug system will load the
module
- Knoppix users: instead of the step above, you'll need to create the file /etc/modutils/acx100_pci, type: kedit /etc/modutils/acx100_pci then add this line: options acx100_pci use_eth_name=1 debug=0x01 firmware_dir=/lib/modules/acx100_fmwe to the file and save it. If you're using a PCI card, you'll need to open /etc/modutils/aliases and add this line to the end of it: alias eth0 acx100_pci, if you're sure you have another active ethernet/lan card in your machine,
use alias eth1 acx100_pci instead and use eth1 as your devicename in all instructions that follow!. CardBus (pcmcia) users don't need or want this line, the hotplug system will load the
module, either way you must type: update-modules when you finish creating that file.
- Update your module dependencies file, type: depmod -a, this may take a while to complete depending on your machine's cpu/disk speed, be patient. Some distros
will return an error with something like "not an ELF file" and pointing at the *.BIN firmware files, this is ok and will not hurt anything. If that bothers you create your "acx100_fmwe"
directory somewhere else, like under /usr and be sure to substitute that path in both the commands above and in
the commands that follow. Important: If you get unresolved symbol errors pointing to the acx100_pci.o module, you *may* need to compile the module on your own
machine, it's possible that the downloaded module will not work for you, I now recommend you continue on and see what happens. Otherwise, see the compiling section and go from there, you don't need to undo anything that
you've already done. When finished the compiling section return here and start over with step #1 and answer "y" if you are asked if you want to overwrite anything
- Check for the presence of a reference to this module in your module dependencies file, type: grep -i acx100 /lib/modules/`uname -r`/modules.pcimap, three lines, all
beginning with "acx100_pci" should be returned, again, note the backticks in this command. The correct output will look like this (pre7 and later, earlier versions may not have the 3rd line identified by the "0x00009066" in it):
acx100_pci           0x0000104c 0x00008400 0xffffffff 0xffffffff 0x00000000 0x00000000 0x00000000
acx100_pci           0x0000104c 0x00008401 0xffffffff 0xffffffff 0x00000000 0x00000000 0x00000000
acx100_pci           0x0000104c 0x00009066 0xffffffff 0xffffffff 0x00000000 0x00000000 0x00000000
Note that if other lines are returned from this command and they don't
begin with "acx100_pci", but something else with acx100 and "sta" in it, you have installed the leaked binary at some point and need to find and move it and repeat the
depmod -a before continuing, see appendix a for how to do that and then return here and continue, if duplicate lines are returned from this command and you just happen to be running Mandrake 9.2 (or later?), you'll need to move their built-in v0.1h module out of the modules tree, I suggest this, type: mv /lib/modules/`uname -r`/kernel/3rdparty/acx100/acx100_pci.o.gz /root. Then, repeat step #6 above
- If you're using a CardBus card (pcmcia), insert the card now, the module should be automatically loaded by the hotplug system. If you're using a PCI card, insert the module
by hand, type: modprobe acx100_pci. Either way if you get errors to the effect that acx100_pci can't be found, and you're sure there's been no typos, then first try repeating the depmod -a command, if you still don't have those 2 lines, then your
distro may require all modules to be gzipped, type: gzip /lib/modules/`uname -r`/kernel/drivers/net/acx100_pci.o and repeat the previous 2 steps
- Check if the module got loaded, type: lsmod | grep acx100_pci, the | character is called a "pipe" and is uppercase
on the backslash key on my machine. One line should be returned beginning with acx100_pci, if not, check the log for clues as to why, type: tail -n 20 /var/log/messages,
there are myriad reasons outside the scope of this document as to why this would fail, chief among them being that you don't actually have an acx100 card, and perhaps the
second most popular reason being your firmware was "not found" which is usually caused by incorrect naming of firmware files in the /lib/modules/acx100_fmwe directory, see the
section in the readme about what files may need to be renamed if you are using your own firmware.
"no such device" errors should not be ignored, try searching/posting on LinuxQuestions.org to see if your card is indeed an acx100-based card
- If all the above completes without error, proceed to testing the module
Compiling your own module and/or using your own firmware
This section is for those whose distros I'm unable to support with pre-compiled modules or for those intrepid newbies who would like to compile this driver module themselves and
learn some interesting things about Linux in the process. If compiling a kernel module is not your thing, or you don't have room for the kernel source package,
check back here from time to time, as I am considering installing additional distros in the near future. As of this writing Mandrake 9.0, Mandrake 9.1, Mandrake 9.2, Redhat 9.0, Fedora Core 1, Slackware 9.0, Slackware 9.1 and Knoppix 3.3 (which is Debian testing/unstable), modules are available here pre-compiled, so you may be able skip this section if you're running, or would consider running any of those fine distros. Otherwise, here's how to compile this module on your own machine:
- You'll need to have the kernel source installed for your distribution, from a root console type: ls -L
/lib/modules/`uname -r`/build/include/linux. If a large number of files show up, you're good. If you get an error, use your distro's package management to install the kernel
source, do not download what appears to be a match from kernel.org, virtually all distros modify the kernel source in some way, use your distro's source package only.
- Note: I no longer recommend using cvs for this project.
Next, you'll need to have cvs installed, to see if it is, type cvs in a root console, if you get an
error of the "not found" variety, you'll need to install the cvs package for your particular distribution.
- Change to the /usr/local directory: type cd /usr/local
- Download the latest source tarball (bz2) from
Andreas' page (<< this opens a new window in your browser), follow his instructions for unpacking it: tar jxf filename.tar.bz2, and make sure to use the source directory created
by unpacking the file in place of "acx100" below, eg: acx100-0.2.0pre7_plus_fixes_14 instead of acx100). Do not unpack the source code using Windows, the end-of-line characters are different in Windows than Linux, and are not compatible. (thanks to Jakob Rohde for that tip)
- If you're going use your own firmware, you'll need to get/open the windows driver (usually a .zip file) for your card and find/copy the
*.BIN firmware files to the firmware directory
under acx100 making sure to rename the files if necessary, as indicated in this section of the readme, more than likely your radio is the rfmd.
The files (version 1.9.3.e) found on my SMC card's windows' driver cd were RADIO0d.BIN, RADIO11.BIN and WLANGEN.BIN, they were already named correctly and these are the
files in the firmware download at the end of this document.
- Note: If you're downloading anything newer than 0.2.0pre6_plus_fixes_10, you'll need to use the 1.9.8.b firmware instead. The older firmware just simply refuses to connect with the later versions of the driver.
- Change to the acx100 source directory, type cd acx100
- Compile the source, type: make
- In preparation for installation, change to the firmware directory, type cd firmware
- Copy those firmware files to the src directory, type: cp *.BIN ../src
- In preparation for installation, change to the src directory, type: cd ../src
- If all the above completes without error, proceed to installing the module and firmware
Testing the module
Once again, I've got a list for you, this is intended as a direct continuation of commands typed into a console(terminal window) as root, after completing the
installing section
If you've made it this far it's time to test your device. Once you verify the operation of the device, you'll want to configure your system to set it up automagically at boot and if
applicable, on a resume from suspend. This section is just for testing things, not for final configuration.
Before we begin the testing phase, you'll need to have the following info handy: Your router's(wireless access point) ip address, something like: 192.168.2.1, your router's and
your wireless card's MAC addresses, something like: 00:03:2F:05:44:D2 and your router's ssid name and WEP encryption key, if any. These should all be obtainable using the
same facility you used to set these things up, typically a web page you go to from your browser. While you're on your router's setup page, I strongly suggest you set WEP
encryption to no more than 64bit (longer keys are quite prone to typos) and just for testing purposes use a hex key that's easily remembered, something like
0123456789, you can change it to something longer and more cryptic once things are working.
- Check if the wireless device exists, type: ifconfig -a, at least 2 devices should be listed, one is always going to be "lo", one may be your wired ethernet card and the
other should be your wireless card, eth0 or eth1, it will look something like this:
eth0    Link encap:Ethernet  HWaddr 00:03:2F:05:44:D2
          ... other lines will appear  here ...
	Interrupt:11 Base address:0x4800
The only things of importance at this point are that the card has an interrupt and a base address and that the HWaddr on the first line matches the MAC address of your card
which is printed somewhere on the card or it's packaging or is viewable from windows.
- Give the wireless card some life, type: ifconfig eth0 192.168.2.10 mtu 576 substituting your device name, eth0 or eth1 and substituting a valid address for your router
or access point, for instance if your router's address is 192.168.1.1, use 192.168.1.10 and so forth.
- Check wireless extensions, type iwconfig, a listing for your wireless device should be returned and should look something like this:
eth0      v0.1g  ESSID:""
          Mode:Ad-Hoc  Channel:1  Cell: 54:57:7B:51:10:86
          Bit Rate=11Mb/s   Tx-Power:18 dBm
          Encryption key:off
          Link Quality:34/0  Signal level:-191 dBm  Noise level:-225 dBm
          Rx invalid nwid:0  Rx invalid crypt:0  Rx invalid frag:0
          Tx excessive retries:0  Invalid misc:0   Missed beacon:0
Don't worry about the details here, if iwconfig returns something like the above, you're good, if it returns something with "eth0 no wireless extensions", and your wireless card is
eth0, you've got kernel problems, most likely caused by compiling your own kernel and leaving out something rather important, in any case, the solution to that problem is outside
the scope of this document. If you get something like "command not found" when you type iwconfig, then you'll need to install the wireless-tools package for your distro (this is likely to happen to Mandrake 9.1 and 9.2 users as the wireless tools don't appear to be a default package). Using your distro's 'software installer', search on the string: "wireless-tools" and install the package that is found. Every distro I have installed (except FreeBSD 5.2) has an already-compiled package for the wireless-tools, so it's highly likely that it is on one of your CD's, do not download and compile the wireless-tools package from sourceforge.net, it's very likely the version will not match correctly to your distro and this will cause all sorts of problems that others will have a difficult time diagnosing, again, you have been warned: use your distro's wireless-tools package only.
- Set up the wireless parameters for your particular environment, type: iwconfig eth0 mode managed channel x essid xxxxxxxx, replacing if necessary, "eth0" with eth1,
and using your router's ssid name and channel # in place of the x's
- If you're using WEP, set up the key, type: iwconfig eth0 key xxxx-xxxx-xx essid xxxxxx for a 64bit hex key, or use iwconfig eth0 key s:yourkeyhere essid xxxxxxxx
for an ascii key, the essid parameter needs to be repeated at the end of most iwconfig commands.
- Check if the config "sticks", type: iwconfig, and the output should be similar to this, with your router's ESSID and Channel displayed and the Access Point being your
router's MAC address. The correct Encryption key should be displayed as well.
eth0    v0.1g  ESSID:"wireless_hoc"  Nickname:"Thinkpad"
          Mode:Managed  Channel:8  Access Point: 00:03:2F:06:F4:13
          Bit Rate=22Mb/s   Tx-Power:18 dBm
          Encryption key:0ACD-41AF-22
          Link Quality:104/0  Signal level:-139 dBm  Noise level:-243 dBm
          Rx invalid nwid:0  Rx invalid crypt:0  Rx invalid frag:0
          Tx excessive retries:0  Invalid misc:0   Missed beacon:0
If you've got "Access Point: 00:00:00:00:00:00" then something's wrong, I suggest setting encryption on the router to a 64bit hex key and repeating the previous step using the
new key. Also, try a couple more iwconfig eth0 essid xxxxxxxxx commands about a second or two apart, this is a quirk of the card/driver, and I theorize, turns on
the radio. You should see the "DATA" light blink once about a half-second or so after each command.
- Set up a route to your router from this device, type: route add default gw 192.168.2.1 eth0, substituting your router's ip address and if need be, your device's name
(eth0 or eth1).
- Try to ping your router, type: ping -c 4 192.168.2.1 substituting your router's ip address for the 192.168.2.1. Output will look like this:
PING 192.168.2.1 from 192.168.2.98 : 56(84) bytes of data.
64 bytes from wrouter (192.168.2.1): icmp_seq=1 ttl=127 time=2.71 ms
64 bytes from wrouter (192.168.2.1): icmp_seq=2 ttl=127 time=0.601 ms
64 bytes from wrouter (192.168.2.1): icmp_seq=3 ttl=127 time=0.609 ms
64 bytes from wrouter (192.168.2.1): icmp_seq=4 ttl=127 time=0.723 ms
64 bytes from wrouter (192.168.2.1): icmp_seq=5 ttl=127 time=0.569 ms
If you get errors with "unreachable" in them, you most likely used the wrong address for your router in either this command or the previous route command, or your encryption key
is wrong, or you need to type: iwconfig eth0 essid xxxxxx again, waiting a moment before attempting the ping, this is a quirk of the card.
- Using a text-editor as described above, open the file /etc/resolv.conf. Make this: nameserver 192.168.2.1 the first line, substituting in your
router's ip address, and save the file.
- Now, here's the big one, try to ping a host on the internet, type: ping -c 4 www.yahoo.com, or some other host of your choice.
- If all the above completes without error, proceed to configuring the interface
Configuring the Interface
I should note that it is finally at this point that you may elect to try your distro's graphical (or otherwise) network configuration tools, if you've made it to this point, it means your
acx100 device is now fully functional. Personally, I have had
no success using any distribution's network configuration tool with my acx100 cards, this device is not yet officially
supported by any distro I know of at this time and the current configuration tools don't seem to know what to do with it when it comes to which module to use,
beware the
wrong module may be assigned to the device if you're not careful to cancel out of the tool, this will cause all sorts of things to be done that you will have to undo, thus,
I don't recommend using your distribution's network config tools on this device/driver. This driver is open-source, highly functional, and well-written, it should
eventually be an official part of your distro. I'd look for it to show up in Mandrake first (
Update: it
has shown up in Mandrake, as of version 9.2, however, see this
warning about Mandrake 9.2). Once it's officially supported by your distribution, their network config tool
should work.
Until then, here's yet-another list to follow for getting the card setup automagically at boot and on a return from suspend, if applicable.
For Redhat, Fedora and Mandrake: (only!) (if you're using slackware, or knoppix/debian, keep scrolling down)
- Using a text editor as described above, open /etc/sysconfig/network-scripts/ifcfg-eth0, susbstituting eth1 if need be. Here's what mine looks like for
this card:
DEVICE=eth0
BOOTPROTO=static
IPADDR=192.168.2.98
NETMASK=255.255.255.0
NETWORK=192.168.2.0
BROADCAST=192.168.2.255
MTU=576
ONBOOT=no
MODE=Managed
CHANNEL=8
RATE=22M
KEY=xxxx-xxxx-xx
ESSID=myessid_name
#IWPRIV='set_debug 0x00'
Lines beginning with a "#" are comments and ignored, I left "#IWPRIV" in there as an example of how to use iwpriv for a particular interface, the line works, but the line we added to
/etc/modules.conf takes care of setting the debug level, so it's superfluous. You may also have noticed that the ONBOOT setting is "no", this prevents the attempted configuring of
the device before the PCMCIA sub-system has loaded, the hotplug system should take care of loading the module when it detects the card. If you're using a PCI card, you'll
want to set ONBOOT to yes.
-
You'll also need to verify the contents of your /etc/sysconfig/network file, here's what mine looks like:
	NETWORKING=yes
	FORWARD_IPV4=false
	HOSTNAME=Thinkpad
	DOMAINNAME=localdomain
	GATEWAY=192.168.2.1
Of most importance in this file is the GATEWAY setting which should match the IP address of your wireless access point or router. One more thing, on my notebook, an IBM
Thinkpad 600, I had to modify the line in /etc/sysconfig/apmd to read "PCMCIARESTART=yes", in order to for a resume from suspend to work as expected.
- That's it! Yep, that should be all you need to do to bring this card up at boot, although remember the quirk, additional iwconfig eth0 essid xxxxxx commands
may be required, even when iwconfig returns all correct info, until you see "Associated!" in your /var/log/messages, you're not associated, again it's my theory that this kicks the
radio on.
For Slackware:
- Using a text editor as described above, open /etc/rc.d/rc.inet1. Here's what you should setup for this card, if your device ended up being eth1,
then scroll down a bit furthur to the same section for eth1, be careful which devicename you're editing, you don't want to screw up eth0's settings if your acx100 device is eth1:
# Edit these values to set up your first Ethernet card (eth0):
IPADDR="192.168.2.98"  # REPLACE with YOUR IP address!
NETMASK="255.255.255.0" # REPLACE with YOUR netmask!
...
...
...
# Edit the next line to point to your gateway:
GATEWAY="192.168.2.1" # REPLACE with YOUR gateway!
- I must admit, I'm still looking for the "proper" place to put the wireless settings in Slackware, until I find it, I'm using the work-around that follows for both CardBus and
PCI cards:
- Open (again) your /etc/modules.conf file in a text editor, and add this line: post-install acx100_pci /usr/sbin/setup_acx100
- You guessed it, /usr/sbin/setup_acx100 is going to be a shell-script that gets executed after the module is loaded, so in your text editor, create a new file and add these lines
to it
#!/bin/sh
iwconfig eth0 mode Managed rate 22M key xxxxxxxxxx essid xxxxxxxx
sleep 2
iwconfig eth0 essid xxxxxxx
the sleep and extra essid command seem to be necessary, as time marches on, this will probably not be true, for now, you should probably use them.
- Save the file as /usr/sbin/setup_acx100
- Make the file executable, type: chmod u+x /usr/sbin/setup_acx100
- Before you ask: yes, I'm aware of the /etc/rc.d/rc.netdevice file that can get created, and I'm also aware of /etc/rc.d/rc.inet1 being another possible place to issue iwconfig's
from. So far, these have not been working and the post-install line in /etc/modules.conf has, I'll update when I get it all figured out
For Knoppix 3.3 (and of course: Debian):
(this section is new and as such not as well tested, please let me know if this works/doesn't work for you)
- First, login as the root user
- Next, you'll need to create a file in /etc/sysconfig/network-scripts named ifcfg-eth0 (or ifcfg-eth1 if this is your 2nd ethernet device) Knoppix 3.3 users, do not allow this device to become wlan0, there will be all sorts of conflicts and confusion created due to Knoppix 3.3's native support of wlan-ng devices, you have been warned, if your acx100 device is wlan0 (as reported by iwconfig or ifconfig), then double-check the contents of your /etc/modutils/acx100_pci file, making sure use_eth_name=1 is there.
- in that file(ifcfg-eth0 or eth1) you'll need the following lines, heed the comments beginning with "#":
	DEVICE=eth0 # if your acx100 is the 2nd ethernet device, use "eth1" instead
	IPADDR=192.168.2.98 # use an ip address appropriate for your access point's ip range
	NETMASK=255.255.255.0 # you shouldn't need to change this
	NETWORK=192.168.2.0 # should be IPADDR (above) with 0 as the last number
	BROADCAST=192.168.2.255 # should be IPADDR (above) with 255 as the last number
	ONBOOT=no # set to "no" for CardBus cards and "yes" for PCI cards
-
Next, you'll need to open your /etc/network/interfaces file and add your acx100 into it like this:
	# /etc/network/interfaces -- configuration file for ifup(8), ifdown(8)

	# The loopback interface
	# automatically added when upgrading
	auto lo eth0 #note the addition of eth0 here, it's the acx100 card
	iface lo inet loopback

	# this is your acx100 card
	iface eth0 inet static # if your acx100 is the 2nd ethernet device, use "eth1" instead
		address 192.168.2.98 # see IPADDR above in step #3
		netmask 255.255.255.0 # ditto
		network 192.168.2.0 # ditto
		broadcast 192.168.2.255 # ditto
		gateway 192.168.2.1 # should be the ip address of your wireless access point or router
		mtu 576 # this is still necessary

		# these are the wireless settings for your acx100 card
		wireless-mode Managed
		wireless-rate 22M
		wireless-channel 8 # use your own channel #
		wireless-key xxxx-xxxx-xx # use your own WEP key here, or "off"
		wireless-essid myessidname # use your own ssid name here, enclose in quotes if it contains any spaces
-
You'll also need to verify that the file: /etc/modutils/acx100_pci exists,and contains this one line:
options acx100_pci firmware_dir=/lib/modules/acx100_fmwe debug=0x01 use_eth_name=1
- After all the above is accomplished, run update-modules as root from a console
For All Distros supported here (Mandrake, RedHat, Slackware, Knoppix/Debian):
Make sure a line exists in your /etc/resolv.conf like this nameserver 192.168.2.1, once again substituting your router's or access point's ip address. Make this the first line in that file. If you find
that you can ping your router or access point no problem, but the minute you try to ping a host on the internet by name, you get errors or it takes forever, the contents of this file are typically the
reason why.
As you may have already surmised, at least at this point in this module's young life, a
root console with
"iwconfig eth0 essid ..." at the ready will be your constant companion if you intend to use it as your everyday interface, not too high a price to pay to use the 22M speed ay?
Downloads
Essential Firmware
Pre-Compiled Kernel Modules
These are listed by distribution and acx100 version, always try the latest version (highest number) first, then regress; before downloading anything: in a console type
uname -r and then gcc -v
(if gcc -v returns more info than just the version, look for a line beginning with "gcc version..."), compare the output with the info below, if you see a match
(even if you're using a different distro) go ahead and download the module and firmware. If no version here matches what you're running, please, don't waste your
time trying to insert one of these modules. You will just get errors and the module will refuse to load, If no module here will work for you see the section on
compiling the module yourself. Note that these modules are tested with the firmware above, but will most likely work with other firmware files
that are properly renamed and located. One last thing, the instructions above assume that the filename of these downloaded module files is preserved on download,
so take care to preserve the filename when downloading, changing the filenames will lead to excessive head-scratching.
Usb acx100 device users: (the DWL-120+, for one) will also need to see the compiling section, and that's about all I can help you with.
I don't have any of those devices here and they are different enough that until I do, I won't presume to know how to get them going for you.
Fedora Core 1
- uname -r: 2.4.22-1.2115.nptl
- gcc -v: 3.3.2
Red Hat 9.0
- uname -r: 2.4.20-8
- gcc -v: 3.2.2
Mandrake 9.2
Mandrake 9.1
- uname -r: 2.4.21-0.13mdk
- gcc -v: 3.2.2
Mandrake 9.0
- uname -r: 2.4.19-16mdk
- gcc -v: 3.2
Slackware 9.1
- uname -r: 2.4.22
- gcc -v: 3.2.3
Slackware 9.0
- uname -r: 2.4.20
- gcc -v: 3.2
SuSE 9.0 - Contributed by Rudi Pittman
Here's his site for the absolute latest acx100 project's SuSE 9.0 RPM's: SuSE 9.0 RPM's, be sure to read any documentation there before downloading and installing the RPMs and enjoy.
Knoppix 3.3 dated 2-9-2004(Debian testing/unstable)
- "Live CD" users, this is the Knoppix 3.3 Live CD download for the release dated 2-9-2004: acx100-0.2.0pre7-knoppix-3.3-2.4.24-xfs.tar.gz please see Appendix B for instructions, substituting the correct filename: acx100-0.2.0pre7-knoppix-3.3-2.4.24-xfs.tar.gz where appropriate
- 0.2.0pre7 for Knoppix 3.3 (2-9-2004) installed to the hard drive
Knoppix 3.3 dated 11-19-2003 or 11-14-2003(Debian testing/unstable)
- uname -r: 2.4.22-xfs
- gcc -v: 3.3
Appendix A: finding and moving the leaked binary driver
This a digression from the installing section, you should be at the same root console you just ran grep -i acx100 /lib/modules/`uname -r`/modules.pcimap on and found
additional lines returned that made you suspect you may have the leaked binary installed, typing pwd at this time should return either /mnt/windows/windows/temp or
/usr/local. Here's a list for finding and uninstalling the leaked binary if it is indeed present.
- change to the top-level modules directory, type: cd /lib/modules/`uname -r` (those are backticks)
- find and verify the signature of the leaked binary, type: grep 'v0.9.0.3a' $(find -name *acx*100*.*) if anything is returned, you have the leaked
binary installed and now must uninstall it. if nothing is returned and you're sure there's been no typos, continue where you left off in the installing
section, but first return to the directory you were in: type cd /mnt/windows/windows/temp or cd /usr/local depending on which one you were in
- move the leaked binary to /root, type: mv $(grep 'v0.9.0.3a' $(find -name *acx*100*.* | grep -v 'acx100_pci.o') | cut -d ' ' -f 3) /root, do not type this more than
once
- it should now be in your /root directory
- if, for some reason the above does not move it out of the modules directory tree, then you'll have to do it manually using konqueror, or your favorite file manager. The file's
name you're looking to move should have been returned in item #2 above
- return to the directory you were in: type cd /mnt/windows/windows/temp or cd /usr/local depending on which one you were using
- return to the installing section and continue starting with item #5
Appendix B: Using the Open Source Acx100 Driver with the Knoppix 3.3 Live CD
note: the 0.2.0pre7 module for the Knoppix 3.3 Live CD dated: 2-9-2004 is in the downloads section above
Knoppix 3.3 Live CD users, don't feel left out, here's the
Knoppix 3.3 Live CD download for version
0.2.0pre6 of the driver, also, here's the download for all you
Knoppix-STD 0.1b Live CD users as well. Knoppix STD users need to remember to substitute "acx100-knoppix-std-0.1b.tar.gz" everywhere you see "acx100-knoppix-3.3.tar.gz" in the following instructions. I would like to thank
b1smooth and
my lovely wife (for the temporary use of her Vaio notebook and her unique "newbie" perspective...*grin*) for helping me test all this.
The Knoppix 3.3 download is a bit different from the others in that it actually contains a stripped-down, pre-compiled version of the acx100 source-code tree with the firmware already in place, along with a modified version of the start_net script, and 2 scripts for the Knoppix Desktop to start/stop the interface. Follow these instuctions to get this card going with the Knoppix 3.3 Live CD.
Here are the steps:
- Download and save the file above using your browser, remembering where you put it.
Windows users should save it to c:\windows\temp, linux users should save it to /tmp, make sure you preserve it's filename.
- If Knoppix is not currently running, stick the CD in and reboot, when it's finished booting, you can close the "welcome" window and open a shell (the button on the taskbar that is a computer screen with a shell on it). Do not su to become the root user, all this can and should be done by the user named "knoppix".
- Unpack the archive, windows downloaders type: tar Pzxf /mnt/hda1/windows/temp/acx100-knoppix-3.3.tar.gz, you may have to type: mount /mnt/hda1 first. Linux downloaders type: tar Pzxf /tmp/acx100-knoppix-3.3.tar.gz
- Open and edit the settings, type: kedit /home/knoppix/Desktop/acx100/scripts/my_settings, using the comments there as your guide, make any necessary changes, save the file, and select file/quit to exit kedit and return to the shell.
- Start the interface, type /home/knoppix/Desktop/start_net it should finish with Interface has been set up successfully, hit enter to regain the prompt.
- Run a quick test, type: ping -c 4 cnet.com, you should see 0% packet loss.
- Optionally, You can now delete the acx100-knoppix-3.3.tar.gz file you downloaded, you can check back here from time to time for new versions if you like.
- In order for any of what you've just done to be there the next time you boot up the Knoppix Live CD you'll need to click the knoppix button on the taskbar and select configure/save KNOPPIX configuration, making sure to check the save all the files on the desktop option and making sure to un-check the network settings option screenshot. Upon
subsequent boots of knoppix you'll need to have at least this much on the command line: knoppix myconfig=scan, along with any other options you normally use such as
lang= or dma, etc...
- Make sure when you boot Knoppix that the media that you saved your settings on is available prior to booting, this can be a hard drive, memory stick, floppy, usb pen drive, etc...
- Now all you have to do whenever you boot the Live CD is click the icon on the Desktop labelled start_net, if for some reason you need to stop the interface, use the other file on the Desktop named (you guessed it) stop_net
- That's it, time to check your email from Knoppix!
Of course, I'd truly love to hear from any of you Knoppix 3.3 Live CD users as to how this works (or doesn't work) for you: